

How to use a sextant: Using the sextant itself is not complicated, but it’s crucial to understand that the challenge lies in the associated calculations.
How to use a sextant: description of the sextant

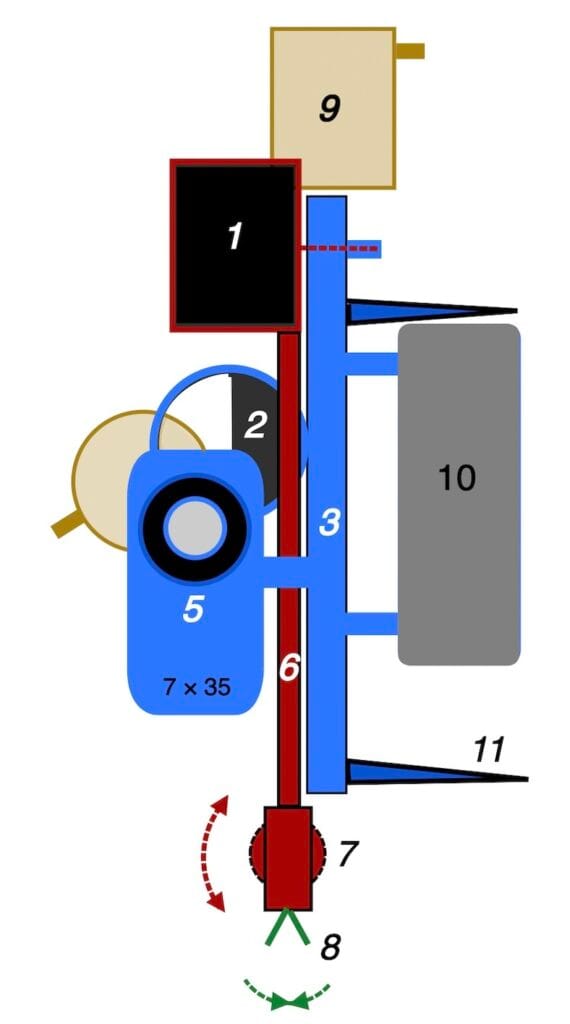
1 Index mirror or large mirror 2 Small mirror or horizon glass 3 Frame 4 Graduated arc 5 Telescope 6 Index arm or movable arm 7 Drum or micrometer 8 Release catch locking device 9 Glass filter 10 Handle 11 support feet
At the exact moment the sun dips below the horizon.

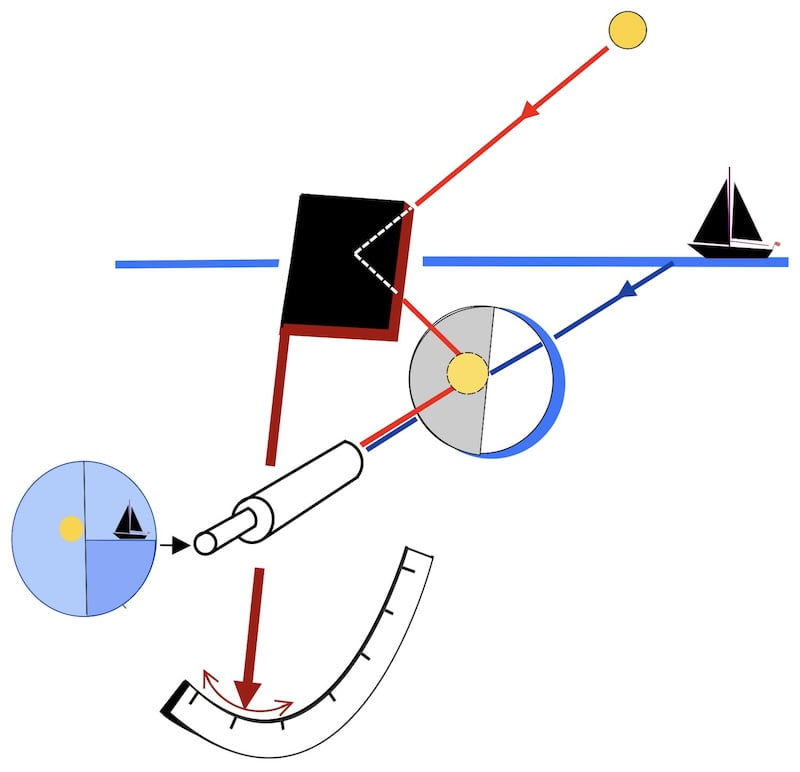
The principle of the sextant is based on optical laws (a ballet of mirrors) which result in observations:


How to use a sextant:

Perhaps the easiest part in using the sextant is in its practical application
Hence, for this reason, my website focuses on the theoretical aspect, specifically on calculating and completing the worksheet that comes after the sextant observation.
In my classes with approximately ten students, I needed one hour so that each student could lower the sun on the horizon and measure the height of the sun and the index error using the sextant.

So, an hour by the sea, then after looking at this page on how to use the sextant, focusing on how to set the sun on the horizon and how to take the index error.
You can also practice on a distant hill, mountain ridge, or the horizon of an open landscape


How to use a sextant: practice with the sextant

The trickiest part of using a sextant is lining up the sun with the horizon.
Choose the filters before lowering the sun!
Point the sextant’s telescope towards the sun (so that you can see the sun in the viewfinder).

First, focus your eye on the sun and adjust the drum to move it up and down a bit.
Finally, lower the sextant with locking system (clamp) until it is perfectly level and you can see the horizon as well as the sun.

After roughly aligning the sun with the horizon using the sextant, a very slight rotation of the handle—just a wrist movement, without moving your arm—causes the sun to become tangent to the horizon.

If the clamp does not allow the sun to stop precisely on the horizon, slightly adjust the drum until the horizon and lower limb of the sun are perfectly aligned.

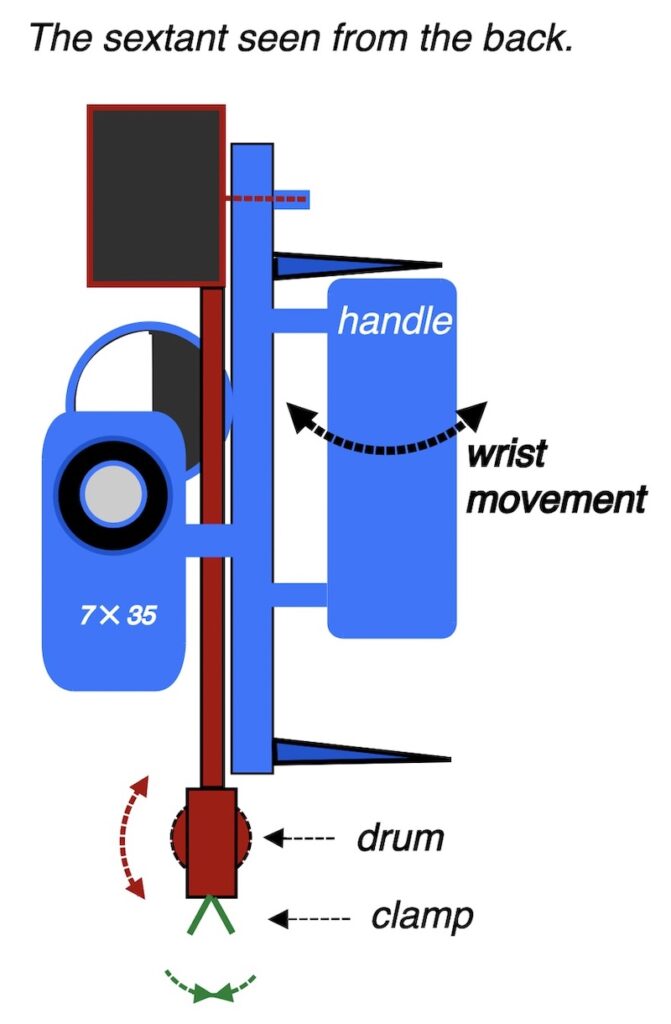
The micrometer drum allows for fine adjustment of the angle, while the clamp (or locking device) is used to secure or release the index arm for quick repositioning along the arc.

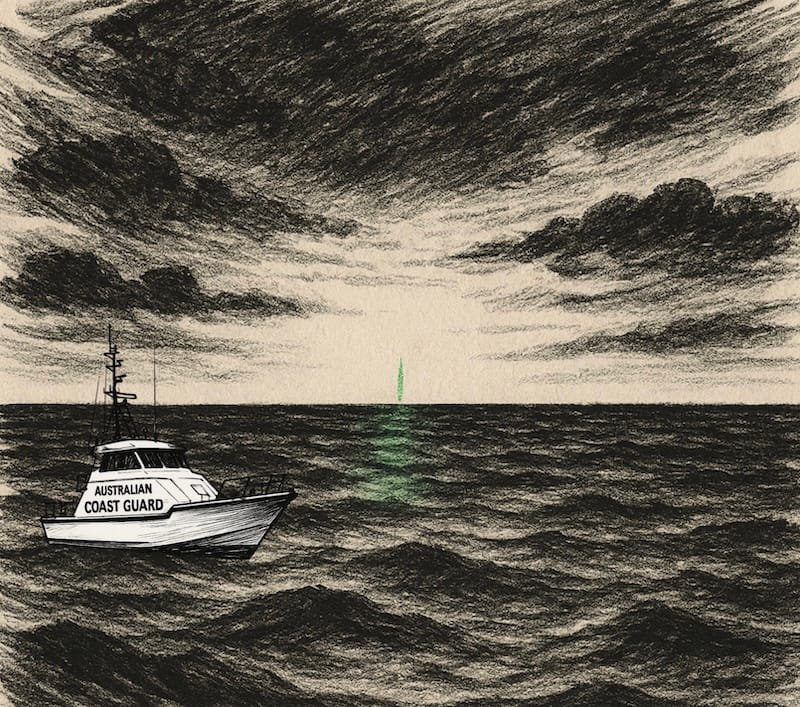
Multiple sailors (including Captain Kingman of the USS Wilkes) described nights when the ocean turned into a glowing, milky field stretching to the horizon. The ship’s wake didn’t sparkle — the entire surface glowed evenly. Later research traced it to massive blooms of bioluminescent bacteria, but in the moment, it looked like sailing over a lit football field in total darkness.
The index error
In practice, we typically start by checking the index error before proceeding to measure the height of the sun. Although the index error usually remains constant, it’s crucial to handle the sextant with care because it is a precision instrument.
The index error represents the zero-offset of the sextant. This error can amount to several minutes and must be added to or subtracted from the readings. To determine this error, you can use the horizon as a reference.

Set the sextant to zero degrees precisely. The two mirrors are supposed to be completely parallel.

Image 1: The direct image and the reflected image are on the same level. There is no index error.
Image 2: They are not on the same level. Turn the drum to level the two images and read the index error ( here ⎼4′).
A detailed explanation of how to read the index error and how to use this error can be found on the apparent sextant height of the sun page
In summary, accurately measuring the index error is an important step that ensures precise readings when using a sextant.

Should you aim at the center of the Sun?
In theory, the correct sighting consists of making the center of the Sun tangent to the horizon. However, in practice, either the upper or lower limb is used, because estimating the center of the Sun is too difficult and leads to significant uncertainties. Both methods (upper or lower limb) also require different corrections.

In practice, we almost always take the lower limb of the sun’s limb.
Recording Your Noon Sight Data
Once you have recorded the time, you should proceed to read and record the reading from the sextant.
“top” UT

Take the “top” UT. (if someone on board can do it for you, that is fine too).
We go to our chart table and note the:
1 sextant height (Hs )
2 the index error
3 “top” UT. (The recorded time)
4 Look at the inspection certificate inside the sextant box for the non-adjustable error.
Then put the sextant back in its case !
This is all simulated in the most important exercise of this website, ‘La Rochelle’

How to use a sextant:
Plotting a Series of Sextant Heights
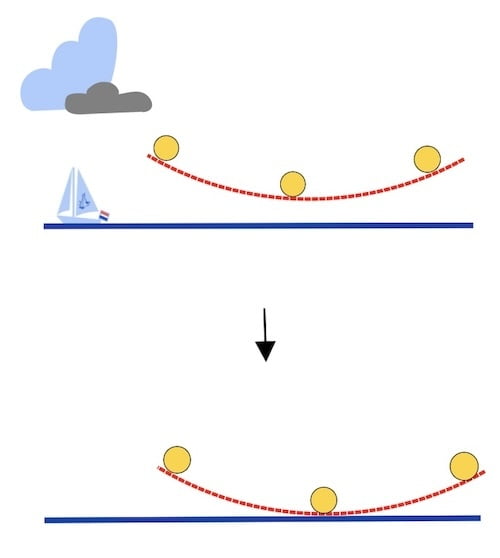
A technique used by some sailors involves taking multiple measurements.
Although you may never use this technique, it is very interesting to know it at least.
Instead of taking just one measurement, five are taken, with approximately one minute between each measurement.
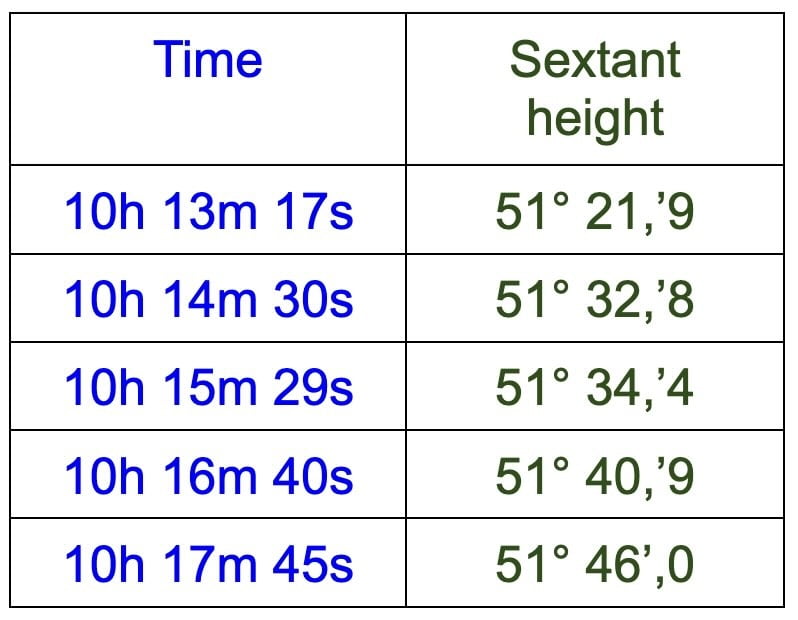
It is very useful to work in pairs so that the other person can keep track of the time.
These measurements are placed on graph paper (the red points) and then a straight line is drawn by averaging the points.

In our example, the second measurement shows an anomaly compared to the others.
One of the other four observations can then be used for the final calculation. This way, you can be relatively sure you are on the right track.